728x90
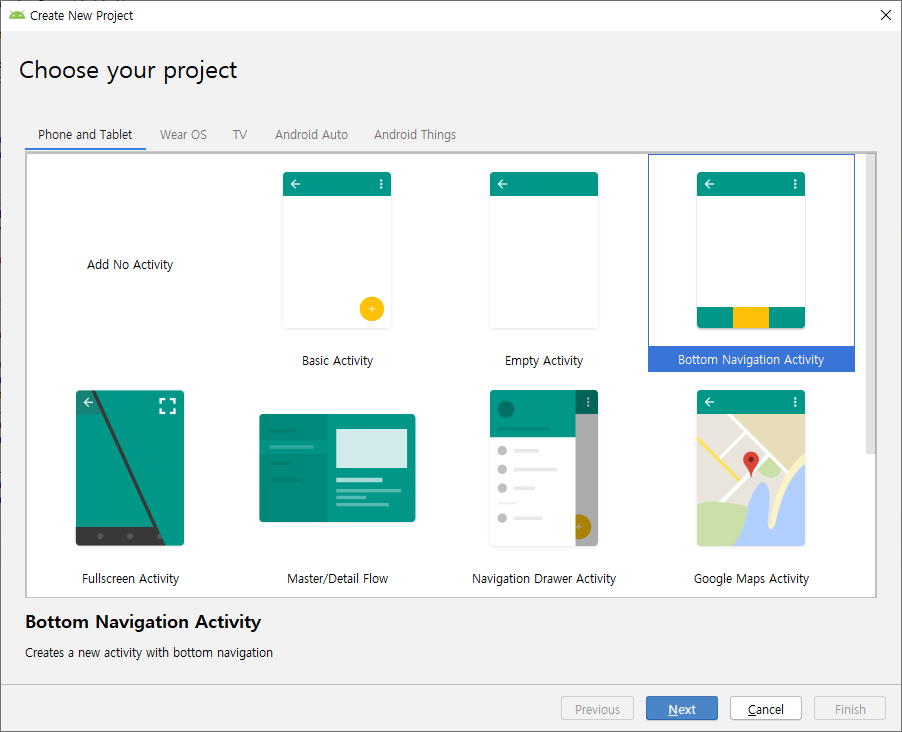
1. 프로젝트 생성
New project를 눌러 Bottom Navigation Activity를 선택 후 생성한다.
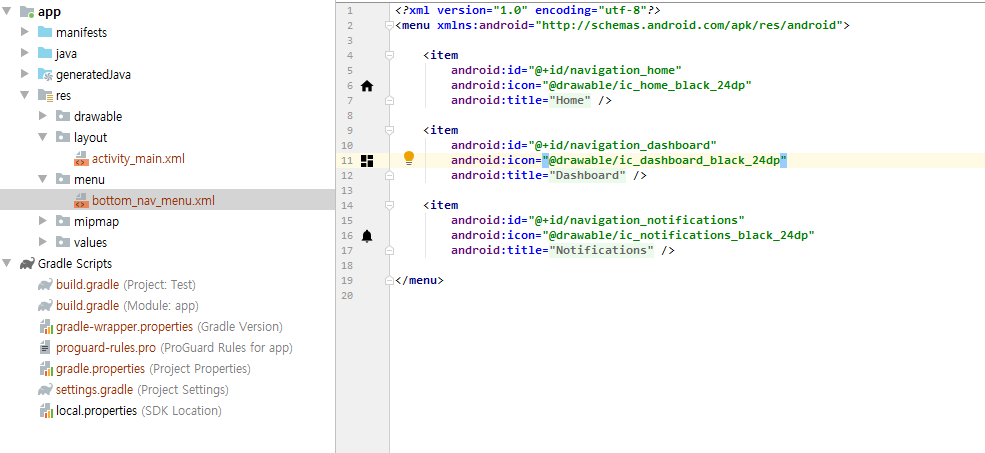
2. Menu 수정
app > menu > bottom_nav_menu.xml 파일이 메뉴를 구성하는 xml 파일인데 본인의 필요에 맞게 수정한다.
3. activity_main.xml 수정
activity_main.xml 파일에 FrameLayout을 추가 후 아래와 같이 코드를 작성한다.
|
1
2
3
4
5
6
7
8
9
10
11
12
13
14
15
16
17
18
19
20
21
22
23
24
25
26
27
28
29
|
<?xml version="1.0" encoding="utf-8"?>
<android.support.constraint.ConstraintLayout xmlns:android="http://schemas.android.com/apk/res/android"
xmlns:app="http://schemas.android.com/apk/res-auto"
xmlns:tools="http://schemas.android.com/tools"
android:id="@+id/container"
android:layout_width="match_parent"
android:layout_height="match_parent"
tools:context=".MainActivity">
<FrameLayout
android:id="@+id/frameLayout"
android:layout_width="match_parent"
android:layout_height="match_parent"
android:layout_marginBottom="?attr/actionBarSize"
/>
android:id="@+id/nav_view"
android:layout_width="0dp"
android:layout_height="wrap_content"
android:layout_marginStart="0dp"
android:layout_marginEnd="0dp"
android:background="?android:attr/windowBackground"
app:layout_constraintBottom_toBottomOf="parent"
app:layout_constraintLeft_toLeftOf="parent"
app:layout_constraintRight_toRightOf="parent"
app:menu="@menu/bottom_nav_menu" />
</android.support.constraint.ConstraintLayout>
|
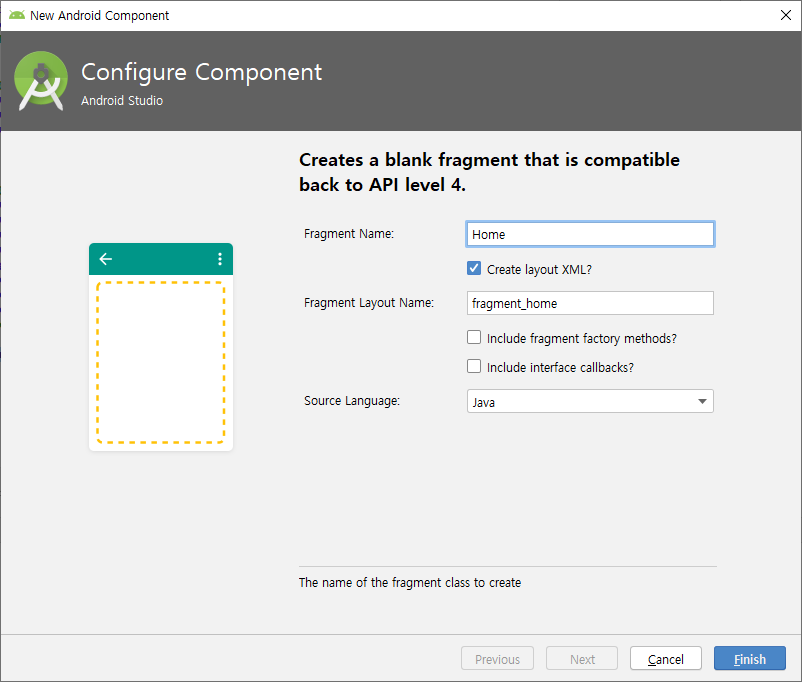
4. Fragment 추가
아래와 같은 방법으로 본인이 필요한만큼의 Fragment를 생성한다.

생성 후 Fragment 파일은 생성 그대로 사용하고 xml파일을 아래코드처럼 수정한다.
|
1
2
3
4
5
6
7
8
9
10
11
12
13
|
<?xml version="1.0" encoding="utf-8"?>
xmlns:tools="http://schemas.android.com/tools"
android:layout_width="match_parent"
android:layout_height="match_parent"
tools:context=".Home">
<TextView
android:layout_width="match_parent"
android:layout_height="match_parent"
android:text="homeFragment" />
</FrameLayout>
|
5. MainActivity.java 수정
마지막으로 MainActivity.java를 아래 코드처럼 작성한다.
|
1
2
3
4
5
6
7
8
9
10
11
12
13
14
15
16
17
18
19
20
21
22
23
24
25
26
27
28
29
30
31
32
33
34
35
36
37
38
39
40
41
42
43
44
45
46
47
48
49
50
51
|
package com.example.test;
import android.os.Bundle;
import android.support.annotation.NonNull;
import android.view.MenuItem;
public class MainActivity extends AppCompatActivity {
BottomNavigationView bottomNavigationView;
FragmentManager fragmentManager = getSupportFragmentManager();
FragmentTransaction fragmentTransaction;
Home homeFragment = new Home();
Notification notificationFragment = new Notification();
Dashboard dashboardFragment = new Dashboard();
@Override
protected void onCreate(Bundle savedInstanceState) {
super.onCreate(savedInstanceState);
setContentView(R.layout.activity_main);
bottomNavigationView = findViewById(R.id.nav_view);
fragmentTransaction = fragmentManager.beginTransaction();
fragmentTransaction.replace(R.id.frameLayout, homeFragment).commitAllowingStateLoss();
bottomNavigationView.setOnNavigationItemSelectedListener(new BottomNavigationView.OnNavigationItemSelectedListener() {
@Override
public boolean onNavigationItemSelected(@NonNull MenuItem menuItem) {
switch (menuItem.getItemId()) {
case R.id.navigation_home:
fragmentTransaction.replace(R.id.frameLayout,homeFragment).commitAllowingStateLoss();
break;
case R.id.navigation_dashboard:
fragmentTransaction.replace(R.id.frameLayout,dashboardFragment).commitAllowingStateLoss();
break;
case R.id.navigation_notifications:
fragmentTransaction.replace(R.id.frameLayout,notificationFragment).commitAllowingStateLoss();
break;
}
return false;
}
});
}
}
|
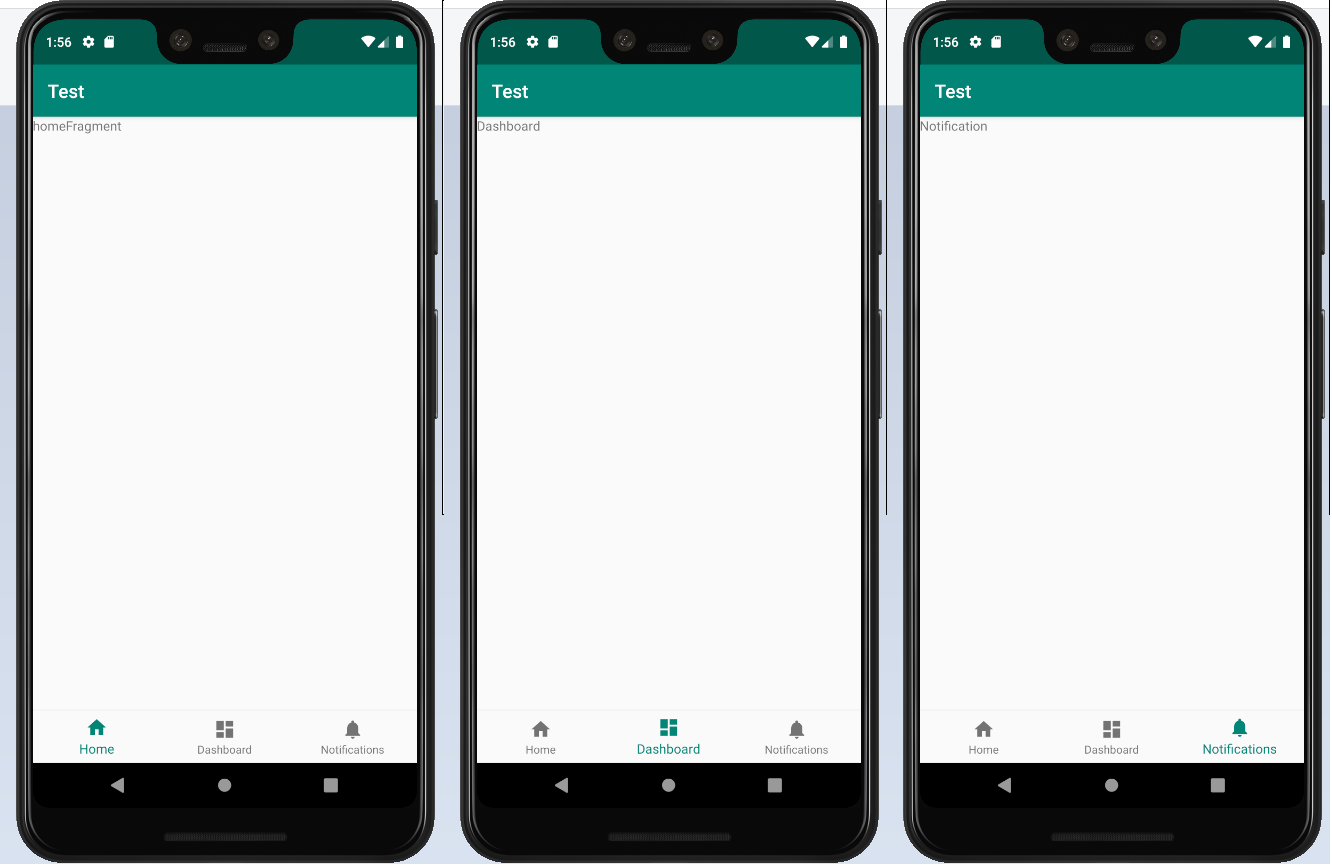
제대로 작성했다면 아래처럼 Navigation Button을 클릭했을 때 Fragment가 전환되는 것을 확인할 수 있다.
참고자료
- 시계는 와치님 tistory blog : https://dev-imaec.tistory.com/11
728x90
'Programming > Android' 카테고리의 다른 글
| 안드로이드 스튜디오 TimePickerDialog 사용하기 (0) | 2019.11.21 |
|---|---|
| 안드로이드 스튜디오 투명도 넣기 (0) | 2019.09.29 |
| Fragment의 생명주기 (0) | 2019.09.23 |
| 안드로이드 스튜디오 도형안에 글씨 넣기 (0) | 2019.08.27 |
| 안드로이드 스튜디오 WebView 이용하여 motion 스트리밍하기 (5) | 2019.08.20 |