이전에 했던 기본 프로젝트에 위젯을 몇개 추가해보고 이벤트 실습도 해보겠습니다.
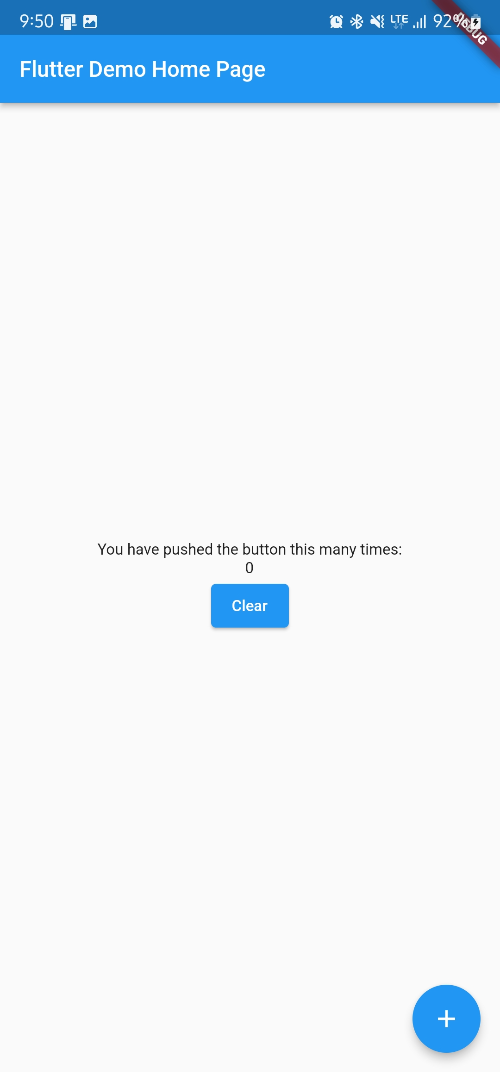
먼저 Button 입니다. Button을 클릭하면 카운터를 초기화 하는 이벤트입니다. 기본 State 객체에 버튼을 하나 추가했습니다.
class _MyHomePageState extends State<MyHomePage> {
  int _counter = 0;

  void _incrementCounter() {
    setState(() {
      _counter++;
    });
  }

  @override
  Widget build(BuildContext context) {
    return Scaffold(
      appBar: AppBar(
        title: Text(widget.title),
      ),
      body: Center(
        child: Column(
          mainAxisAlignment: MainAxisAlignment.center,
          children: <Widget>[
            const Text(
              'You have pushed the button this many times:',
            ),
            Text(
              '$_counter',
              style: Theme.of(context).textTheme.bodyText2
            ),
            TextButton(
                onPressed: () {
                  setState(() {
                    _counter = 0;
                  });
                }
                , child: const Text('Clear'))
          ],
        ),
      ),
      floatingActionButton: FloatingActionButton(
        onPressed: _incrementCounter,
        tooltip: 'Increment',
        child: const Icon(Icons.add),
      ), // This trailing comma makes auto-formatting nicer for build methods.

    );
  }
}
clear 버튼을 누르면 카운터 변수 값이 초기화되고 화면이 갱신됩니다.

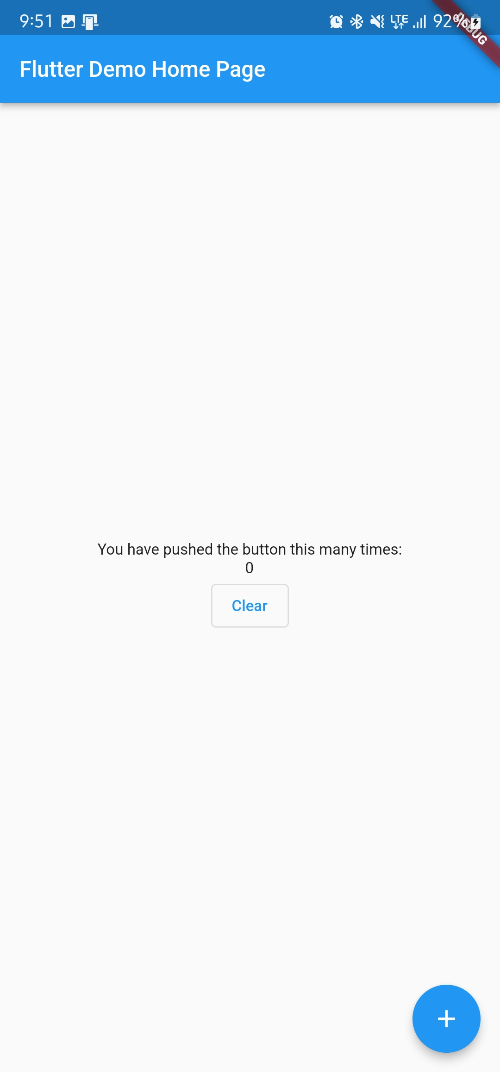
이 버튼의 종류는 여러가지가 있지만 일반적인 버튼은 TextButton, ElevatedButton, OutlineButton 등이 있습니다.
다음으로 입력창입니다. 입력 위젯은 TextField입니다.
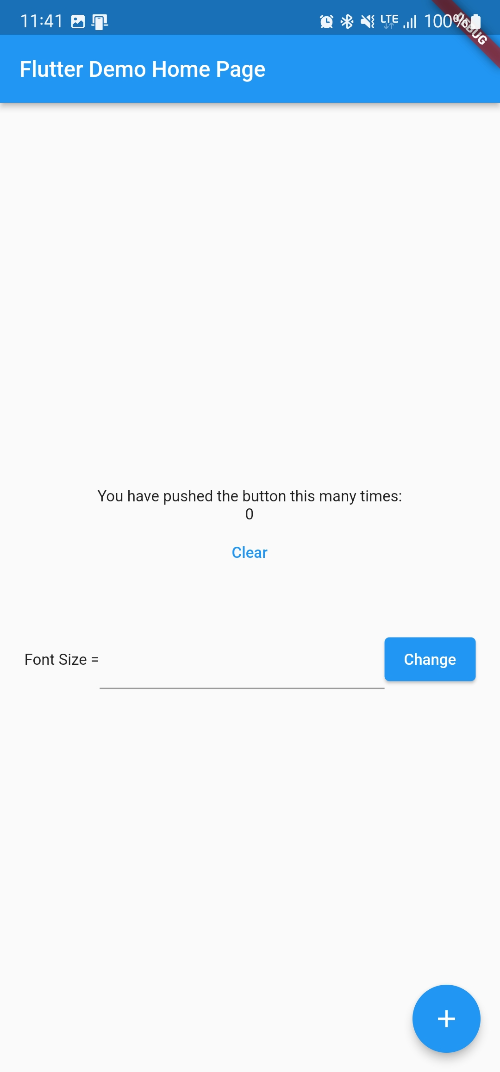
화면을 보니 Clear 버튼의 글자 크기가 너무 작은거 같아서 TextField를 통해 폰트 크기를 전달 받고 Change 버튼을 누르면 Clear 버튼의 글자 바꿔 키워보겠습니다.
TextField로 입력한 값을 받아 활용하기 위해서는 TextEditingController를 사용해야 합니다. 기존 레이아웃은 column으로 font 변경관련은 row로 배치하기 위해 Container로 분리하였습니다.
class _MyHomePageState extends State<MyHomePage> {
  int _counter = 0;
  TextEditingController value = TextEditingController();

  void _incrementCounter() {
    setState(() {
      _counter++;
    });
  }

  @override
  Widget build(BuildContext context) {
    return Scaffold(
      appBar: AppBar(
        title: Text(widget.title),
      ),
      body: Center(
        child: Column(
          mainAxisAlignment: MainAxisAlignment.center,
          children: [
            Container(
              alignment: Alignment.center,
              padding: const EdgeInsets.all(20),
              child: Column(
                children: <Widget>[
                  const Text(
                    'You have pushed the button this many times:',
                  ),
                  Text(
                      '$_counter',
                      style: Theme.of(context).textTheme.bodyText2
                  ),
                  TextButton(
                      onPressed: () {
                        setState(() {
                          _counter = 0;
                        });
                      }
                      , child: const Text('Clear')
                  ),
                ],
              ),
            ),
            Container(
              padding: const EdgeInsets.all(20),
              child: Row(
                children: <Widget>[
                  const Text(
                      'Font Size ='
                  ),
                  TextField(
                    keyboardType: TextInputType.number,
                    controller: value,
                  ),
                  ElevatedButton(
                      onPressed: (){},
                      child: const Text(
                        'Change'
                      ),
                  ),
                ],
              ),
            ),
          ],
        ),
      ),
      floatingActionButton: FloatingActionButton(
        onPressed: _incrementCounter,
        tooltip: 'Increment',
        child: const Icon(Icons.add),
      ), // This trailing comma makes auto-formatting nicer for build methods.

    );
  }
}
그런데 실제 결과를 보면 아래처럼 입력창이 제대로 나오지 않습니다.
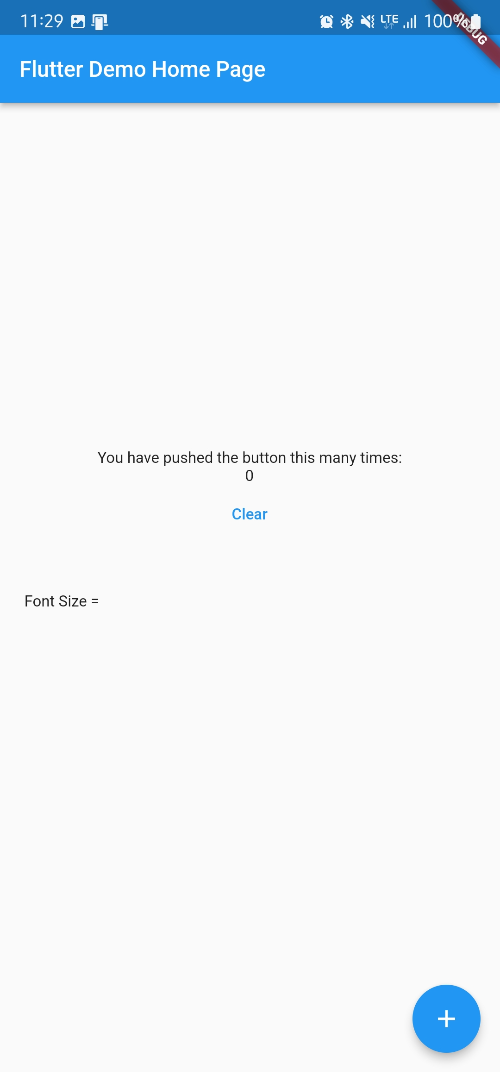
Row 배치를 Column 배치로만 바꾸면 제대로 나옵니다.
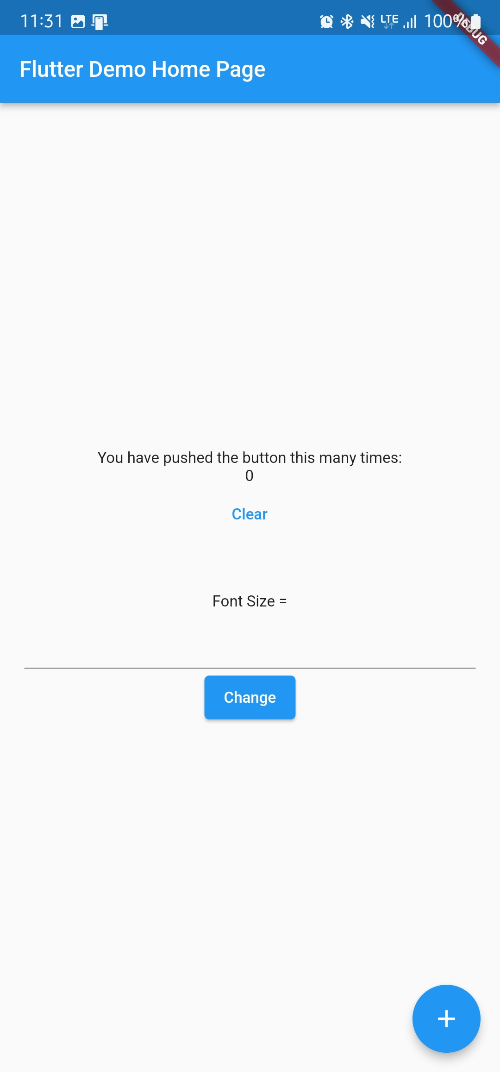
이때는 TextField를 Flexible로 감싸면 됩니다.
class _MyHomePageState extends State<MyHomePage> {
  int _counter = 0;
  TextEditingController value = TextEditingController();

  void _incrementCounter() {
    setState(() {
      _counter++;
    });
  }

  @override
  Widget build(BuildContext context) {
    return Scaffold(
      appBar: AppBar(
        title: Text(widget.title),
      ),
      body: Center(
        child: Column(
          mainAxisAlignment: MainAxisAlignment.center,
          children: [
            Container(
              alignment: Alignment.center,
              padding: const EdgeInsets.all(20),
              child: Column(
                children: <Widget>[
                  const Text(
                    'You have pushed the button this many times:',
                  ),
                  Text('$_counter',
                      style: Theme.of(context).textTheme.bodyText2),
                  TextButton(
                      onPressed: () {
                        setState(() {
                          _counter = 0;
                        });
                      },
                      child: const Text('Clear')),
                ],
              ),
            ),
            Container(
              padding: const EdgeInsets.all(20),
              child: Row(
                children: <Widget>[
                  const Text('Font Size ='),
                  Flexible(
                    child: TextField(
                      keyboardType: TextInputType.number,
                      controller: value,
                    ),
                  ),
                  ElevatedButton(
                    onPressed: () {},
                    child: const Text('Change'),
                  ),
                ],
              ),
            ),
          ],
        ),
      ),
      floatingActionButton: FloatingActionButton(
        onPressed: _incrementCounter,
        tooltip: 'Increment',
        child: const Icon(Icons.add),
      ), // This trailing comma makes auto-formatting nicer for build methods.
    );
  }
}
이제 이 입력 창을 클릭하면 숫자를 입력할 수 있는 키패드가 나오게 됩니다.
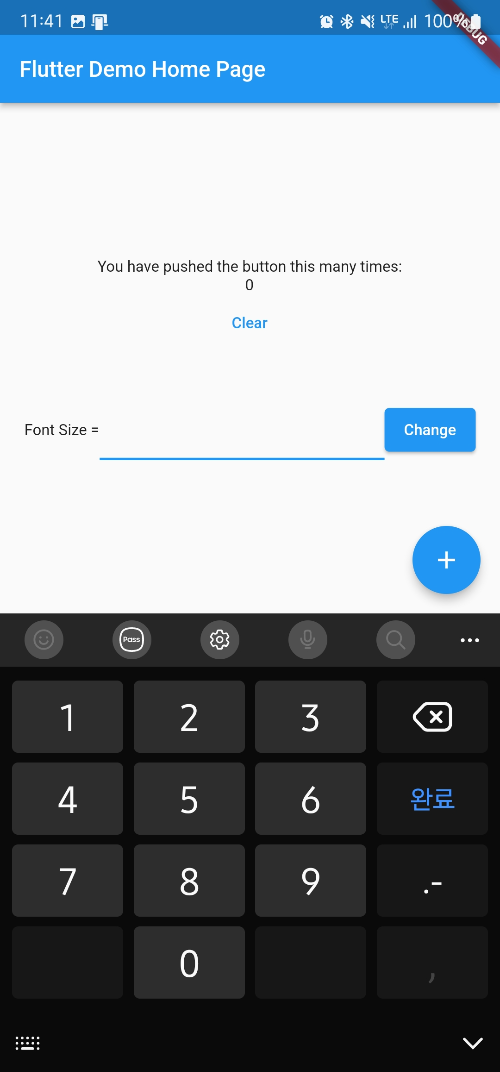
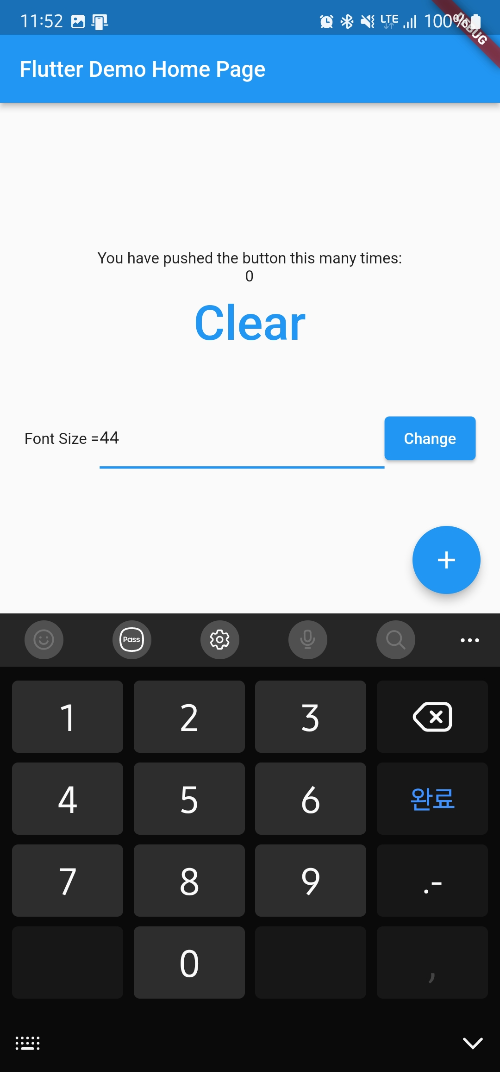
이제 입력 값을 통해 FontSize를 변경하기 위해 Button onPressd 시 TextEditingController 값을 파싱합니다. 그 후 SetState를 호출하면서 파싱된 값을 Size 변수에 넘기고 Size의 값은 Button의 TextStyle에 넘겨주게 됩니다.
class _MyHomePageState extends State<MyHomePage> {
  int _counter = 0;
  TextEditingController value = TextEditingController();
  int size = 0;

  void _incrementCounter() {
    setState(() {
      _counter++;
    });
  }

  @override
  Widget build(BuildContext context) {
    return Scaffold(
      appBar: AppBar(
        title: Text(widget.title),
      ),
      body: Center(
        child: Column(
          mainAxisAlignment: MainAxisAlignment.center,
          children: [
            Container(
              alignment: Alignment.center,
              padding: const EdgeInsets.all(20),
              child: Column(
                children: <Widget>[
                  const Text(
                    'You have pushed the button this many times:',
                  ),
                  Text('$_counter',
                      style: Theme.of(context).textTheme.bodyText2),
                  TextButton(
                      onPressed: () {
                        setState(() {
                          _counter = 0;
                        });
                      },
                      child: Text('Clear',
                        style: TextStyle(
                          fontSize: size.toDouble()
                        ),
                      ),
                  ),
                ],
              ),
            ),
            Container(
              padding: const EdgeInsets.all(20),
              child: Row(
                children: <Widget>[
                  const Text('Font Size ='),
                  Flexible(
                    child: TextField(
                      keyboardType: TextInputType.number,
                      controller: value,
                    ),
                  ),
                  ElevatedButton(
                    onPressed: () {
                      setState(() {
                        size = int.parse(value.value.text);
                      });
                    },
                    child: const Text('Change'),
                  ),
                ],
              ),
            ),
          ],
        ),
      ),
      floatingActionButton: FloatingActionButton(
        onPressed: _incrementCounter,
        tooltip: 'Increment',
        child: const Icon(Icons.add),
      ), // This trailing comma makes auto-formatting nicer for build methods.
    );
  }
}
'Programming > Flutter' 카테고리의 다른 글
| [Flutter] Dart 문법 (0) | 2022.11.23 |
|---|---|
| [Flutter] 프로젝트 내 폰으로 실행 (0) | 2022.11.20 |
| [Flutter] 기본 프로젝트 설명 (0) | 2022.11.18 |
| [Flutter] 비동기 처리 (0) | 2022.11.18 |
| [Flutter] 개발 환경 세팅 (0) | 2022.11.17 |
