728x90
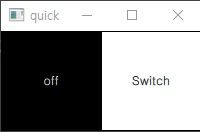
이전 포스팅까지는 스위치 ON/OFF 예제라던지 등에 Rectangle에 MouseArea를 이용하여 버튼과 비슷한 동작을 만들어 사용했습니다. QtQuick.Controls 모듈을 import할 시 사용할 수 있는 Control Object는 기존의 Button과 같은 UI들을 제공하기 때문에 이 포스팅에서는 몇개의 오브젝트 예제를 다뤄보려 합니다.
먼저 Button입니다. 간단하게 Button Object를 생성하면 Item에 MouseArea 처리 없이 Button으로 사용이 가능합니다.
import QtQuick 2.15
import QtQuick.Window 2.15
import QtQuick.Controls 2.15

Window {
    width: 640
    height: 480
    visible: true
    id:windows

    Row {
        anchors.centerIn : parent
        spacing: 10

        Button {
            width: 200
            height : 100
            text : "button"
        }
        Button {
            width: 200
            height : 100
            text : "button"
        }
        Button {
            width: 200
            height : 100
            text : "button"
        }
    }
}
Button의 이벤트 처리도 onClicked같은 signal로 처리 가능합니다.
import QtQuick 2.15
import QtQuick.Window 2.15
import QtQuick.Controls 2.15
Window {
width: 640
height: 480
visible: true
id:windows
Row {
anchors.centerIn : parent
spacing: 10
Button {
width: windows.width / 5
height : windows.height / 3
text : "yellow"
onClicked: {
rect.color = "yellow"
}
}
Button {
width: windows.width / 5
height : windows.height / 3
text : "blue"
onClicked: {
rect.color = "blue"
}
}
Button {
width: windows.width / 5
height : windows.height / 3
text : "red"
onClicked: {
rect.color = "red"
}
}
Rectangle {
id : rect
width: windows.width / 5
height : windows.height / 3
Behavior on color {
ColorAnimation {
duration: 200
}
}
}
}
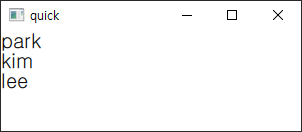
}다음으로 TextInput을 대체할 수 있는 TextField 오브젝트와 TextArea 오브젝트입니다.
import QtQuick 2.15
import QtQuick.Window 2.15
import QtQuick.Controls 2.15
Window {
width: 500
height: 300
visible: true
id:windows
Row {
spacing: 10
padding: 10
Column {
spacing : 10
TextField {
id:textfield
width:windows.width / 2
height:windows.height / 6
font.pixelSize: 20
}
Rectangle {
border.width: 1
width:windows.width / 2
height:windows.height * 5 / 6
TextArea {
id:textarea
anchors.fill: parent
font.pixelSize: 20
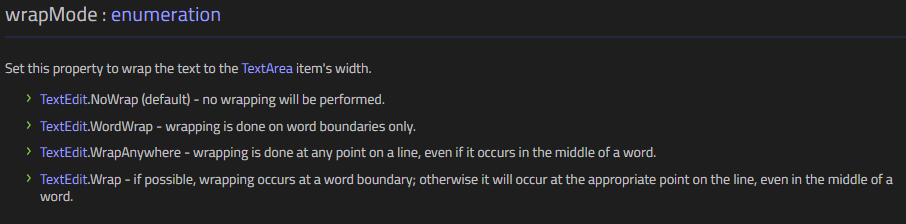
wrapMode: TextEdit.WordWrap
}
}
}
Button {
width:windows.width / 6
height:windows.height / 6
text: "clear"
onClicked: {
textfield.text = ""
textarea.text = ""
}
}
}
}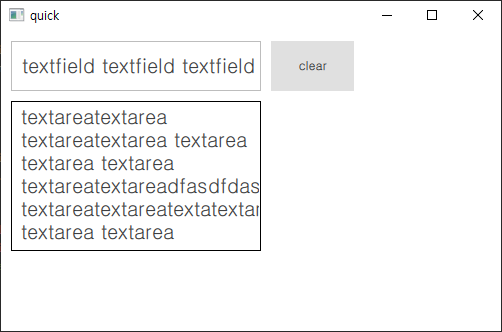
TextField와 다르게 TextArea는 여러줄 입력이 가능하고 줄 바꿈에 대한 기준은 TextArae의 wrapMode Property를 통해 설정이 가능합니다.
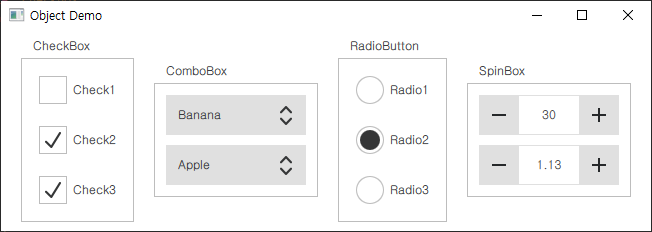
다음은 CheckBox, ComboBox, Radiobox, SpinBox 오브젝트입니다.
import QtQuick 2.15
import QtQuick.Window 2.15
import QtQuick.Controls 2.15

Window {
    visible: true
    width : 650
    height: 200
    title: qsTr("CheckBox Demo")

    Item {
        anchors.fill: parent
        Row {
            anchors.centerIn: parent
            spacing: 20

            GroupBox {
                title:"CheckBox"
                anchors.verticalCenter: parent.verticalCenter

                Column {
                    spacing:10
                    CheckBox {
                        text : "Check1"
                    }
                    CheckBox {
                        text : "Check2"
                    }
                    CheckBox {
                        text : "Check3"
                    }
                }
            }

            GroupBox {
                title:"ComboBox"
                anchors.verticalCenter: parent.verticalCenter
                Column {
                    spacing : 10
                    ComboBox {
                        model: [ "Banana", "Apple", "Coconut" ]
                    }
                    ComboBox {
                        model: ListModel {
                            id: cbItems
                            ListElement { text: "Banana"; }
                            ListElement { text: "Apple"; }
                            ListElement { text: "Coconut"; }
                        }
                        onCurrentIndexChanged: console.debug(cbItems.get(currentIndex).text)
                    }
                }
            }

            GroupBox {
                title:"RadioButton"
                anchors.verticalCenter: parent.verticalCenter
                Column {
                    spacing:10
                    RadioButton {
                        text : "Radio1"
                    }
                    RadioButton {
                        text : "Radio2"
                    }
                    RadioButton {
                        text : "Radio3"
                    }
                }
            }

            GroupBox {
                title: "SpinBox"
                anchors.verticalCenter: parent.verticalCenter

                Column {
                                    spacing:10
                    SpinBox {
                        from : 0
                        to : 1000
                        stepSize : 10
                    }

                    SpinBox {
                        id: spinbox
                        from: 0
                        value: 110
                        to: 100 * 100
                        stepSize: 1

                        property int decimals: 2
                        property real realValue: value / 100

                        validator: DoubleValidator {
                            bottom: Math.min(spinbox.from, spinbox.to)
                            top:  Math.max(spinbox.from, spinbox.to)
                        }

                        textFromValue: function(value, locale) {
                            return Number(value / 100).toLocaleString(locale, 'f', spinbox.decimals)
                        }

                        valueFromText: function(text, locale) {
                            return Number.fromLocaleString(locale, text) * 100
                        }
                    }
                }
            }
        }
    }
}
728x90
'Programming > Qt' 카테고리의 다른 글
| [Qt] QML(5) - TimeTimer 프로그램 만들기 (0) | 2023.04.17 |
|---|---|
| [Qt] QML(4) - QML/C++ 통합하기(Q_PROPERTY, Q_INVOKABLE, SIGNAL) (0) | 2023.04.13 |
| [Qt] QML(2) - State/Transition, ListView, Property (0) | 2023.04.12 |
| [Qt] QML(1) - Object, Layout, Event (0) | 2023.04.10 |
| [Qt] windeployqt 사용하기 (0) | 2023.04.07 |